Web Based Remote Monitoring
Reliable Web based solutions for monitoring the condition or status of remote assets no matter where you or they are located.
Read more...
Reliable Web based solutions for monitoring the condition or status of remote assets no matter where you or they are located.
Read more...
SIL rated alarms systems, wireless telemetry and web based inventory tracking systems. Connects to your existing tank gauging.
Read more...
Advanced proven Impressed Current Cathodic Protection Systems incorporating Remote Monitoring and Control. New or retrofit existing sites.
Read more...
Specialised monitoring systems for Radiological environments including
nuclear power stations, storage facilities, PET
Centres etc.
Read more...
Real time energy, water, gas, air and/or steam monitoring for industry, commercial buildings and campuses. Meets reporting standards and reduces cost.
Read more...
Remote Temperature monitoring systems tailored for pharmaceutical and food industry applications from laboratories to warehousing. Meets reporting standards.
Read more...
Process Alarm Systems to IEC61508 and Event recording to sub-millisecond resolution making plants safer and reducing downtime.
Read more...
Upgrade your legacy alarm systems to current safety standards with minimum plant disruption. Custom solutions to suit individual needs.
Read more...
Data2Desktop provides an end-to-end solution to your remote
monitoring needs. Data2Desktop relieves you of the technical
complexities of implementation, with rapid low risk deployment.
Turn your organisation into a Real Time Enterprise within days.
more...

Remote Monitoring Specialists
![]()
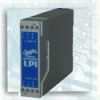
Instrument PSUs

Priced to perfection
DIN Rail mounted
All Round Protection
Adjustable 24Vdc o/p
Support > Knowledgebase Article K149
Ask for assistance:
Please provide us valuable feedback on this article or product:
Make a sales enquiry:
It is recommended to use the USB to serial adaptor available from Omniflex.
To connect the USB to Serial Port adaptor to an Omniflex device, the following is necessary:
The CD packaged with the adaptor.
The USB to serial cable packaged with the product.
If the USB to serial port adaptor has already been installed, go to step 4.
Insert the CD you received with the adaptor into the Optical Drive of the computer.
To setup USB on your computer, perform the following steps:
Connect the USB to serial adaptor into a spare USB port on your computer.
In Windows 7, you will see a message above your system tray indicating that Windows is installing the device driver.
Wait a few minutes for the device to install. Once Windows indicates the driver was successfully installed, continue to the next section. (If Windows indicates there was problem, see the section below - Installing the Driver Manually.)
Open the Device Manager on the computer:
Open the Start menu.
Right-click Computer and select Properties.
In the left-hand window pane, click Device Manager.
In the Device Manager under "Ports (COM & LPT)", there now will be a COM port called the name of the adaptor such as "Moxa USB Serial Port (COMX)". Make a note of the number of the COM port.
If the COM port number value is above 9 or the same as another COM port device, you will have to change the port number. If this is the case:
Double-click on the COM port. This will open the properties window.
Go to the tab "Port Settings".
Click Advanced.
In the Advanced settings window, there is a drop down box in the bottom left displaying the COM port number. Change this to a COM port number below 10.
Make a note of the number of the COM port. You will need to know this number when setting up Omniset to use the COM port.
You have successfully installed the USB to Serial Port adaptor driver. Reboot your computer to ensure the setting changes have taken effect.
NB!!! MAKE SURE YOU USE THE SAME USB PORT EVERY TIME OTHERWISE WINDOWS WILL CONFIGURE ANOTHER COM PORT.
If you experienced trouble with step 3 in USB Setup:
Disconnect the USB cable.
Open Windows explorer and navigate to the product CD drive.
Open the USB driver directory.
If you are using Windows XP 32-bit, run the file ending in Setup.exe.
If you are using Windows XP 64-bit, run the file ending in Setup_x64.exe.
If you are unsure which one you are using, click the "Start" menu, right-click "My Computer" and select "Properties". This window will show you what version your computer is running.
Follow the installer instructions.
Once the installation is complete, connect the USB to serial port adaptor to a spare USB port on your computer.
Continue with step 4 in USB Setup.
Other related articles
Product Ranges